Friday, May 4, 2012

Birthday Favor Boxes

Recently my 4 year old celebrated his birthday. I threw together these favor boxes in minutes. The craft boxes are from Stampin' Up! and will be available in he new catalog which launches June 1.
The takeout boxes were from a party supply store. I wrapped them in a 2 inch strip of Big Top Birthday  DSP (122348, $10.95). It will be retiring at the end of the month but is still available until supplies last. The medallions on top were so quick and easy to make. 
Decorative label punch (120907, $16.95)
2-3/8 Scallop Circle pinch (118874, $16.96)
Perfectly Penned Stamp Set (122892 Clear, $12.95)(122890 wood, $16.96)
Tempting Turquoise Classic Ink
Real Red, Daffodil Delight, Whisper White Card Stock


OCCASIONS MINI STAMP SETS STILL AVAILABLE

May 3, 2012If you  love the sets in the Occasions Mini Catalog, you are in luck! Because of the short time period between the end of the Occasions Mini Catalog and the launch of the 2012-2013 annual catalog, we have decided to make the carryover stamp sets available early--starting today!
The following stamp sets are available for purchase. We hope you will enjoy this extra little sneak peak to the annual catalog.

 Stamp Set Name
 Item Number
 Wood-Mount
 Clear-Mount
 Baby Prints    
     125470    
 125472
 Love & Laughter
 125475
 125477
 Bordering on Romance
 125480
 125482
 Apothecary Art
 125525
 125527
 Mixed Bunch
 125535
 125537
 Tea Shoppe
 125545
 125547
 Mouthwatering
 125675
 125677
 Loving Thoughts    
 125843
 125845
 Salon de thé
 125934
 125936
 Etiquetas florales
 --
         125941        
 Art floral
 125964
 125966

Monday, January 30, 2012

Now for more current things…


The New Occasions Mini and Sale-A-Bration are in full swing. I had a blast playing with some the products that I earned for free from the SAB catalog (every $50 order earns you a free product). I used the “Home Sweet Home Décor Elements” along with the “Every Day Enchantment” Designer Series Paper to make this cute wall hanging. I did not do to much planning and just went for it. The “Home Sweet Home” is on the glass and the art is behind giving it a nice 3D effect.

I used the small circle punch from the “Itty Bitty Punch Pack” to make the scallops around the door. I sponged Soft Sued on all the edges to give it the worn look.


 The tree was cut from Soft Sued Card Stock with a hobby blade and I added leaves for the “Bird Builder “ punch and flowers from the “Itty Bitty Punch Pack”  (Calypso Coral CS with Poppy Parade ink on the edges.)

The hills were done with DSP and CS and the edges were sponged with Luck Limeade then distressed with the distressing tool. The tree trunk covers the seam in the DSP.


The clouds turned out so cute! I traced the clouds from the  “On Board Merry Medley” pack then cut them out. I then embossed them with the “Swiss Dot” embossing folder and Big Shot. I rubber my white craft ink pad directly onto the paper to highlight the edges. Before adhering them down, I stamped the vine from the “Vintage Vogue” Stamp set to give the clouds that wispy look.


Friday, January 27, 2012

Happy Holidays a little late.


I know it is a bit late but I wanted to post some photos of projects that I finally got around to finishing this year for the holidays.  A few of them graced the center of the dining room table. Last year I attended a class at a local store and made the cake box designed by Karin at http://www.creativechaos.typepad.com/. I wish I had her creative talent. I finally had a chance to embellish one of those paper mache reindeers from Michael’s and made a box with some old paper I picked up years ago. It was for my husband’s white elephant exchange at work.  This year I also made a trio of trees inspired by the tree on page 21 of he Idea Book and Catalog. All of the banners were printed from my computer with some of my favorite phrases and thing from the holidays.  This project took a little time but was well worth it in the end. I used snowflakes cut with the Big Shot and lace ribbon rosettes with a flat back pearl for the toppers.  I finally got around to making a wreath that I saw online a while ago. I have since lost the link so I cannot credit the creator properly. It was a simple concept though. Lots of scalloped circles rolled into cones and glued to a form to make the wreath. I hung the final wreath on a mirror.


Tuesday, October 4, 2011

Some more fun projects

Here are a few things that I have crafted lately. First, I made a small gift for my weight watchers leader Judy. She gives us coupons for reaching activity goals and was always sifting through her little pile. This will keep her a little better organized. I made it with plain old envelopes and a the outer box was made with Stampin' Up!'s wood sheets. was so fun and easy to do.


Next I had fun copying a project form Stampin' Up!'s new Holiday Mini. I found the crows, boxes and black cloth at Micheals. The rest is all Stampin' Up! products.


Last I had even more fun with the Pick your Poison DSP from the Holiday mini and made this banner. The little skellies were also from Michael's but everything else was from SU of course.

Monday, July 25, 2011

Convention 2011 Highlights

Explore Your Creativity with Stampin' Up!

Other Random Cards

Here is a collection of cards that I have made over the last two months.

This card uses paper and stamps from the Occasions Mini. 
Stamps: On The Grow
Paper: Playful Polkadots Simply Scrappin' Kit
Ink: Daffodil Delight, Crumb Cake, Old Olive, Basic Grey, Melon Mambo, Pumpkin Pie.
Accessories: Black Satin Ribbon, Top Note Bigz Die.

I had some extra pieces from my Convention swaps so I mad this variation for my husband. See older post for details.

This is the card that I made my mom for her birthday. The DSP, including the doily are from the new Designer Series Paper  "Flirtatious Specialty" in the new 2011-2012 Idea Book and Catalog. I gathered the doily in the middle to make it ruffled. Then added the Designer fabric brad and pompom trim from the Holiday mini (retired). The dress was made using our new Flirtatious Designer Fabric and wrapped around the dress form from the "Sew Suite" stamp set also from the Holiday Mini. I also used the Daffodil delight 1/8 taffeta ribbon.

This is a graduation card that I made for a cousin of my husband. This is an isle card and simple to make.
Stamps: Curls ans Swirls (Occasions Mini)
Ink: Baja Breeze
Paper: Green House Gala (retired), Baja Breeze, Chocolate Chip, Whisper White, Daffodil Delight,
Accessories: Beautiful Wings Embosslits Die, Little Leaves Sizzlets die, Scallop Circle die, Circle Scissor Plus, Basic Pearls.

Father's Day

I know. Father's Day was over a month ago. I was a bit busy getting ready for Convention and have not had time to post for a while. Just wait till i post my Mother's Day cards. Any How. Here are the cards and mini scrapbook that I made for my Dad FIL and husband. Of course my husband got the mini book.
 I am not used to making masculine cards and have very little in the way of masculine themed papers. I found this black and cream colored paper in my stash along with the black "silk shamus" paper. I got them years ago before I was a SU Demonstrator and could not bare to get rid of them. Good thing too, they did just the trick. The ribbon is not from SU. I got it off a pair of pajamas that I got myself during the holidays. Yes, I saved the ribbon that it came wrapped in. It was to nice to toss. Any how... I wrapped the cards with the ribbon and used the jumbo eyelets from SU, now discontinued, sniff sniff. I also used the Big Shot and Serif Essentials dies to cut the letters. I then rounded the corners and BAM! masculine cards.  The mini book also had mini vintage brads and library clips and linen thread from SU. Yes, I misspelled "special." Not just once but twice :) I do know how to spell that word, I promise. I did fix it later. "Besides," I told my husband, "it is not a Joanna original if something isn't misspelled."


Wedding Card

My MIL needed a wedding card that she could put money in. She told me that she did not need anything fancy, chuckle. I have had a role of paper that I purchased years ago that was so beautiful that I could not bare to cut into. I thought that this was the perfect occasion to get over that fear. This was a bit complicated and took a little time. I made the scroll from from vanilla CS and rolled on it with crumb cake ink and the Very Vintage. I rolled it off once before rolling onto the paper to soften the look. I then curled it and burned the edges with a candle to age it even more. The sentiment was printed from the computer and the birds were made with the Bird Builder punch. The small hearts came from the Owl Builder punch. The large heart was from the Heart to Heart punch and covered with SU's Champaign glass glitter. The ribbon is silk ribbon from when I thought I was going to get in to silk ribbon embroidery.


The inside had a place to present some money for the newly weds. I used two scalloped circles and some ribbon to hold it secure. There was several other details but it was a while ago that I made this card so I cannot remember them all.
I have yet to hear whether or not the couple enjoyed the card.

Convention Swaps

What a couple of weeks I just had. July 12 to 17 I was in Salt Lake City for the Stampin' Up! Convention and had a blast. After a couple of days and a chance to catch my breath I was head deep in another convention. San Diego hosts Comic Con International and because my husband is a huge comic fan I have grown to appreciate them as well. So, from July 20 to 24 I was occupied with a completely different type of convention.
I defiantly prefer the Stampin' Up! Convention. So much less crowded, up beat and entraining for me. I could do that convention every week. Here are the swaps that I made for the Convention.

This is a collection of Simply Adorned charms that I created then printed on My Digital Studio.
Convention-2011, Wishing You a Wonderful Day

This card was inspired by my theme song “Sunshine, Lollipops, and Rainbows” by Lesley Gore. My husband picked it out and I think it fits me to a T.

Stamps: Bring On the Cake, Trendy Trees
Ink: Daffodil Delight, Basic Black
Paper: Naturals White, Daffodil Delight, Wisteria Wonder, Whisper White, Pool Party, Poppy Parade, Lucky Limeade.
Accessories: ¾ Circle Punch,
Boho Blossoms Punch, Small Oval Punch, White Embossing Powder, baby q-tip for the stick, Swiss Dot Embossing Folder. Scallop Square Bigz Clear Die.

Convention-2011, Happy Birthday

Stamps: Curly Cute, Four Frames.
Paper: Whisper White, Tempting Turquoise, Tangerine tango, Melon Mambo, Crumb Cake, Vellum.
Ink: Versa Mark, Daffodil Delight.
Accessories: Itty Bitty punch pack, ¾ inch circle punch, Scallop Edge Punch, Stars #2 Sizzix  originals die, Dazzling Diamonds glitter, Basic Rhinestones,  Melon Mambo Embossing powder, Square Lattice Embossing Folder.

It Runs in the Family

Recently I hosted my own workshop and we had a great time. Two of my younger sisters, Audrey and Caroline, both 16, attended and joined in on the fun. The make and take was simple yet beautiful and everyone had a choice of what colors they wanted to use on the card. The original card is to the right and the next photos show what my sisters decided to do instead. They were never known to fallow the crowd as they are so unique even for twins. I might have to steal one of those for my own sample collection. I am very proud of them!


Wednesday, May 11, 2011

Birthdays. Good for Stamping, Bad for Diets!


Zach had a classmate who had a party a few weeks ago. This is the card I made for a 7 year-old boy.

Stamps: Bring On the Cake (Occasions Mini), Party This Way (IB&C)
Paper: Tempting Turquoise, Real Red, Daffodil Delight, Tangerine Tango, Old Olive.
Ink: All of the above, Basic Black.
Accessories: 2-3/8 Scallop Circle punch, Circle Scissor plus, White Gel Pen.

Card Ensemble


I made these cards together for a gift set. They all used a neutral color base for the color palette and then small punches of color to make them pop. I used a variety of stamp sets, some current and some retired.


“Wish Big”
Stamps: Bring On the Cake (Occasions mini), Music notes Wheel.
Paper:  Naturals Ivory, Very Vanilla, Basic Black, Rich Razzleberry, Melon Mambo, Pear Pizzazz, and Newsprint DSP.
Ink: Basic Black and Versa Mark.
Accessories: Stampin’ Pastels, Build a Cupcake Punch, Black Embossing Powder, pear Pizzazz Seam binding Ribbon, Stampin’ Dimensionals.


“Thanks So Much”
This Card was inspired by another card artist,  Valerie Stangle.
Stamps: Nature Walk (Occasions mini), Tiny Tags (IB&C).
Paper: Crumb Cake, Very Vanilla, Old Olive, So Saffron, Botanical Gazette DSP.
Ink: Old Olive, So Saffron, Early Espresso, Crumb Cake.
 Accessories: ¾” circle punch, 1/8” circle punch, Spiral Border punch, piercing pack, linen twine, Vintage Trinkets, Stampin’ Dimensionals.


“Awash With Flowers”
Stamps: Awash With Flowers (IB&C), Notably Ornate (IB&C)
Paper: Crumb Cake, Basic Black, Watercolor paper, Very Vanilla, News Print DSP.
Ink: Staz-on Black, Crumb Cake, Pumpkin Pie, Rick Razzleberry, Old Olive.
Accessories: Ticket Corner Punch, Mini Library Clips, Black 1/8” Taffeta Ribbon, Aqua Painter, Stampin’ Dimensionals.


“Sweet Summer”
Stamps: Sweet Summer (SAB)
Paper: Natural Ivory, Basic Black, Watercolor paper, Mellon Mambo,
News Print DSP.
Ink: Staz-on Black, Mellon Mambo, Rick Razzleberry, Old Olive.
Accessories: Dotted Scallop Ribbon Border Punch, Basic Pearls, Black 5/8” Satin Ribbon, Aqua Painter, Stampin’ Dimensionals.


“Watermelons”
Stamps: Music notes Wheel.
Paper: Natural Ivory, Basic Black, Pear Pizzazz, Pink Pirouette
News Print DSP.
Ink: Basic Black, Mellon Mambo, Pear Pizzazz.
Accessories: Black Rinestones (Winter Mini 2010), Black 5/8” Satin Ribbon, Glimmer Brads (In Colors). Dotted Scallop Ribbon Border, Boho Blossoms, Ticket Corner, 1-3/8” and 1-1/4” circle punches, Stampin’ Dimensionals.

Mother's Day Isle Cards


For mother’s day this year I was lucky enough o have two mothers to make beautiful cards for. They are both isle cards which means they stand up like and artists isle.


The blue card uses the butterfly from the Strength and Hope” set in the Summer Mini. I first inked the stamp with Versa Mark and the inked it in the Pear Pizzaz and rolled in Not Quite Navy before stamping. That is a total of three inks on one stamp all at once. I then stamped it onto vanilla cardstock and heat embossed with Iridescent Ice EP.  To make my life easy I cut the antennae off and replaced them with floral stems, added pearls from the Basic Pearls pack and viola! Beautiful shimmery butterflies.

The Pink card uses a stamp from The Greeting Farm, which I colored with copic markers. Both cards use paper from the Occasions Mini called “Springtime Vintage.” The roses were so easy to make.  I will have to post a tutorial on that soon.

Saturday, February 26, 2011

Tre Chic


So I needed a thank you card for a sweet gal. I recently got new glasses from Lens Crafrters and the sweetest lady helped me out. Her name is Amanda. She was so kind and helpful that I thought that a thanks you card would be nice so this is what I whipped up.
It was so simple to put together. First I stamped a Crumb Cake (craft) card base with the "Bella Toile" background stamp in Crumb cake ink. I then stamped the dress form from "Chic Boutique" in versa mark ink, added white embossing powder and heated. I then stamped the dress form again on a scrap of natural ivory paper in crumb cake and cut out. I added a simple skirt from more scraps and some pompom trim from the Occasions Mini.The Fabric Designer Brad is also from the Occasions mini as well. She loved it!

Tuesday, February 15, 2011

Cupcake Box tutorial.


Cupcake Box Tutorial

Supplies needed:

3 in diam. paper mache box,

½ 3 in diam. Styrofoam ball,

patterned paper,

hot glue gun with lots of glue sticks,

satin seam binding ribbon,

sewing machine or needle and thread,

Big shot and dies,

and a combination of various punches, inks, stamps, and embellishments.

Cover your box:

If your paper is a color that does not work well with the color of the box, you may want to paint or cover it with coordinating paper like cupcake #1. If your paper does work well you can skip this step if you like.


Make your base:

Cut two strips of paper for your cupcake wrapper. One will be 2.5 in by 12 in and the other will be 2.5 in by 6 inches. (Cupcake #1 had a 3 in tall base but I think the 2.5 in base looks better.) With a scoring blade or score board, score your paper every ¼ in. (Tip: score every ½ on one side then flip and score the remaining ¼ in scores on other side. This will help thefolding process go more smoothly.) Now fold back and forth then join two strips together then close the loop with the pattern that you want on the outside. Place box, with lid on, upside down on table and place wrapper around the box. Now comes the tricky part. With one hand form the wrapper so that the ends facing you are slightly closer together causing the paper to flair on the opposite end. Now with the other hand use a hot glue gun to adhere the wrapper to the box. Hold until glue dries. Cover a scrap piece of cardboard with coordinating paper then use Big shot and scallop circles #2 die from Sizzix. Use hot glue again to adhere to bottom of cupcake. Use a decorate strip to cover the glue around the base.

Make candle:

Role a piece of coordinating paper cut 2.5 in x 1.5 in to make a 2.5 in tall candle. Glue closed. Use the wing segment for the Two Step Bird bunch to make a flame. Add a small strip of paper to flame. Cover with glitter then use hot glue to glue in top of candle.

Frosting:

You will need about 5-6 feet of ruffled ribbon. Box #1 uses satin ribbon. I needed 15 feet to make 5 feet of ribbon. Box #2 used 6 feet of ruffled seam binding in crumb cake, 18 feet unruffled. You can do this by hand by running a basting stitch down the middle then ruffling it. OR use your sewing machine! I turned my tension all the way to 9 and maximized my stitch length. The machine ruffled the ribbon for me! All machines may vary so play with yours to find the settings that work for you.

Glue ½ Styrofoam ball to the lid of the box. Use a pen in top of ball to make a hole for your candle. Glue Candle in hole. Now glue the ruffled ribbon the ball. Let the ribbon lie as it likes. Do not force it to lie flat on the stitching. It will naturally want to twist around so let it. Fallow along the edge of the box if you wish to cove it or start at the edge of the foam if your box is painted or covered if you like (see box #1.) This is why I needed more length in ruffled ribbon for box #2.

Decorate! Use buttons, punches, silk roses, pearls or anything you wish to make sprinkles on your cupcake .Be careful not to make it look to yummy or someone may actually try to eat it. Have fun making your own confectionary masterpieces.

Monday, January 31, 2011

Here is a link to Karin's blog. She is the brain child behind the V-Day box that I posted yesterday. This is also how I came up with the idea for the cupcake box. I hope you enjoy here site. Don't forget to come back soon. It has been requested that I post a tutorial for the cupcake box so I shall.

Have a great day!

Saturday, January 29, 2011

Spring Time Fun!

I've been busy working on a few projects these past few weeks. It took a while for me to get my new workspace set up and organized. I'll post pics as soon as I get it clean again.
Valentines Day is getting close and I just finished putting together
Zachary's classroom valentines. I have to stuff them with goodies but they are finished. I used a craf
t envelope to make a pouch then aded the paper twine and robot. I love the "Best Bots Forever" set. to make the background I simply placed all of the robot body parts one one large acrylic block and created my own background stamp. Love the new cling mount stamps! I also made a V-Day card on the fly by request. One of Zaldy's cousin
s needed one for her beau. I hope he likes it (pink robot card). Th
e small box was made with the new "First Edition" paper in the Occasions Mini, "News Print" paper in t
he Idea book and Catalog, Rose superfine glitter and rose seam binding, also in the occasions mini. i found the flowers and floral supplies at the local craft store. It was fashioned after some boxes that I made at a class that I took at a local craft store. It was such a blast. The ones that we made in the class were a little simpler. What took this one longer was the 3D hear on top that I sculpted from styrofoam
and then deco-podged the "First Ed
ition" paper onto. The seam binding ribbon and crepe paper were gathered using my sewin
g machine. "Sew" easy.
The new Minis have so
many wonderful product I cannot wait to use them all.

I also had fume making a b
ox that looks like a cupcake from the new "Ice Cream Parlor" DSP and buttons both av
ailable in the "Sale-A-Bration" mini. I gathered the Satin ribbon just like on the other box and hot glued it to half of a styrofoam ball. Add a few "sprinkle" buttons and a candle and it looks too good to eat.
The bird cage is a project that I had been wanting to do for a while. I have had the little fairy figurine for a while and have always anted to make a home for him. One day I was at Micheal's and they had everything I needed to bring that picture in my mind to life. Now I have something prety to look at while I work. He sleeps on my desk and makes me smile every time I see him.

Here's looking forward to spring.

Friday, August 20, 2010

"Squeaks"


August is almost over and this means the summer mini is too. This card was made with a stamp set from the mini called "Bouquet Bunch."
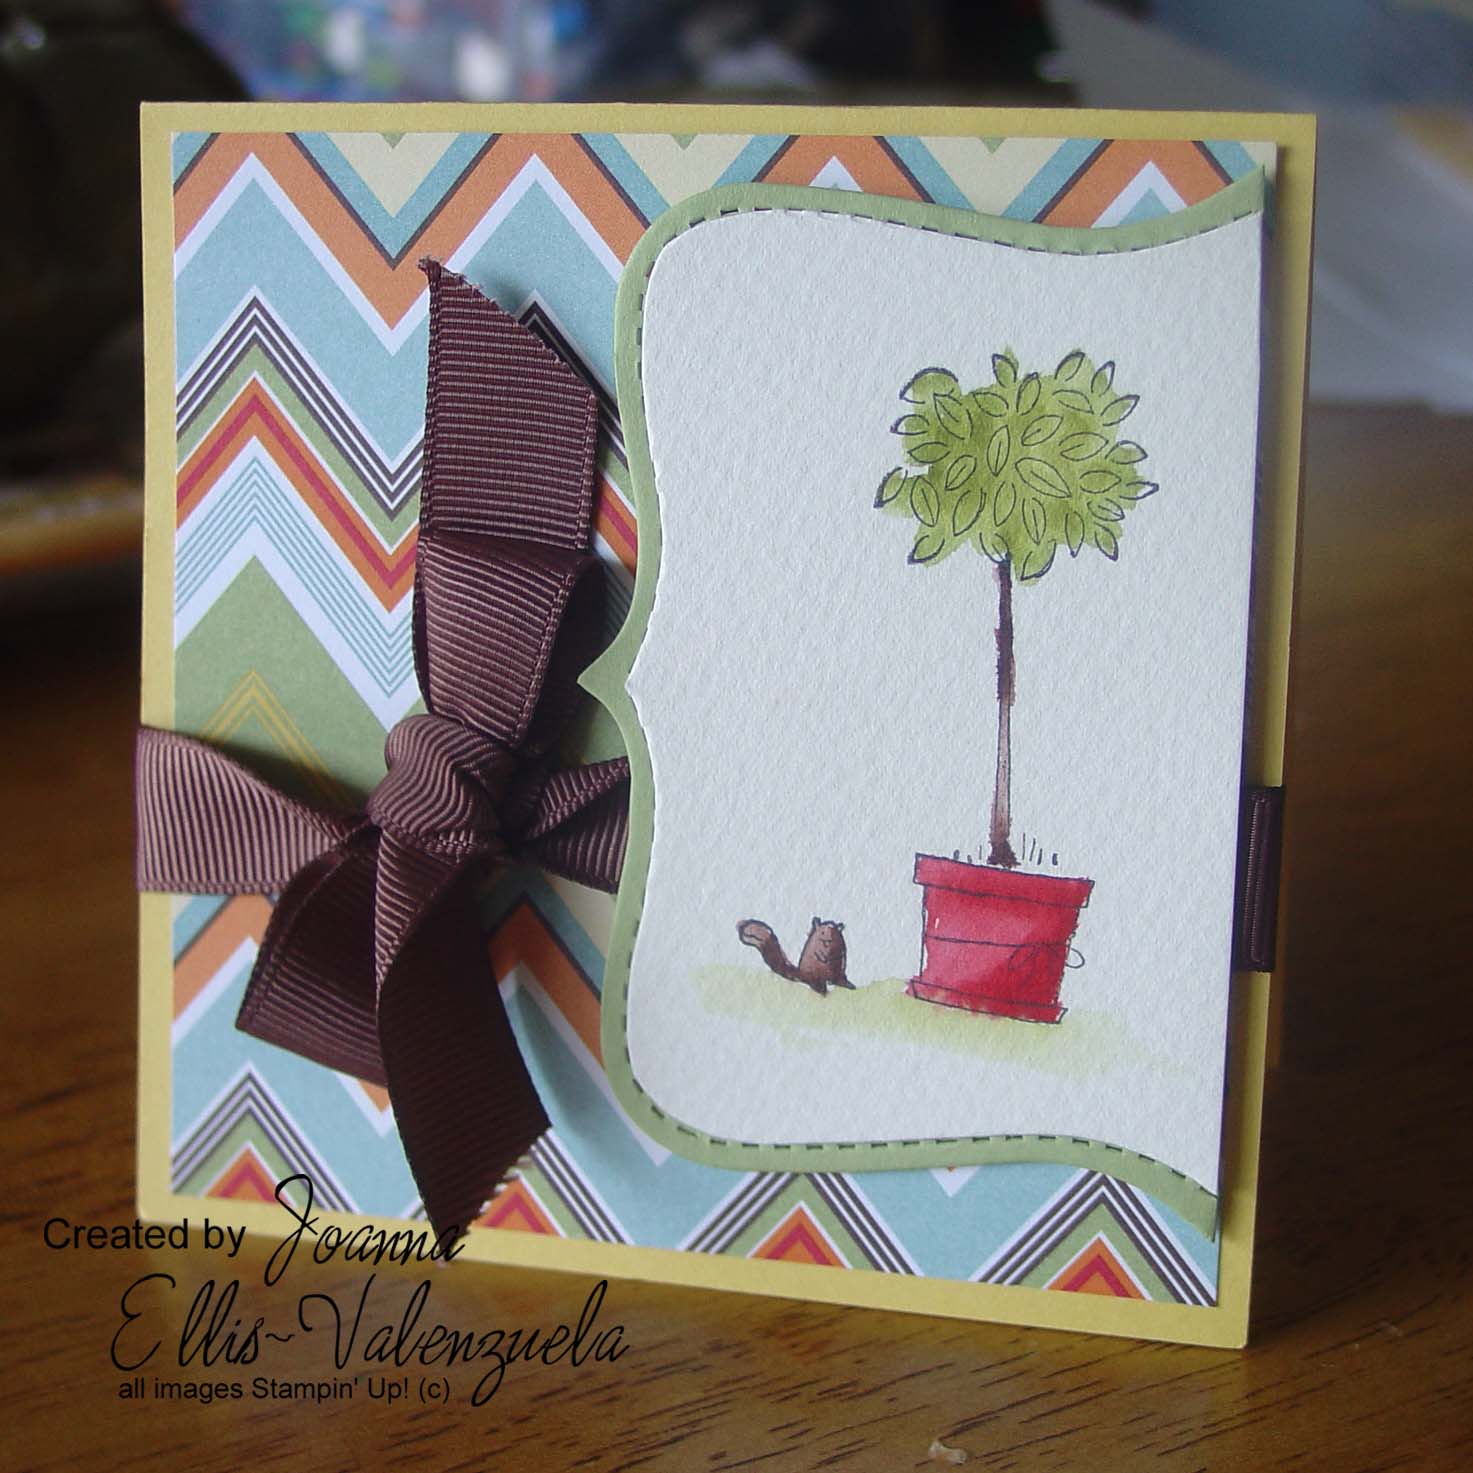
I used Stazon ink on watercolor paper and a few Stamp-n-write markers to add color. I then used a water color pen to "smoosh" the color around. Instant art! The squirrel is so cute, I will name him Squeaks.
Thanks for stopping by.