Saturday, February 26, 2011
Tre Chic
Posted by Joanna at 11:38 AM 1 comments
Tuesday, February 15, 2011
Cupcake Box tutorial.

Supplies needed:
3 in diam. paper mache box,
½ 3 in diam. Styrofoam ball,
patterned paper,
hot glue gun with lots of glue sticks,
satin seam binding ribbon,
sewing machine or needle and thread,
Big shot and dies,
and a combination of various punches, inks, stamps, and embellishments.
Cover your box:
If your paper is a color that does not work well with the color of the box, you may want to paint or cover it with coordinating paper like cupcake #1. If your paper does work well you can skip this step if you like.

Make your base:
Cut two strips of paper for your cupcake wrapper. One will be 2.5 in by 12 in and the other will be 2.5 in by 6 inches. (Cupcake #1 had a 3 in tall base but I think the 2.5 in base looks better.) With a scoring blade or score board, score your paper every ¼ in. (Tip: score every ½ on one side then flip and score the remaining ¼ in scores on other side. This will help thefolding process go more smoothly.) Now fold back and forth then join two strips together then close the loop with the pattern that you want on the outside. Place box, with lid on, upside down on table and place wrapper around the box. Now comes the tricky part. With one hand form the wrapper so that the ends facing you are slightly closer together causing the paper to flair on the opposite end. Now with the other hand use a hot glue gun to adhere the wrapper to the box. Hold until glue dries. Cover a scrap piece of cardboard with coordinating paper then use Big shot and scallop circles #2 die from Sizzix. Use hot glue again to adhere to bottom of cupcake. Use a decorate strip to cover the glue around the base.

Make candle:
Role a piece of coordinating paper cut 2.5 in x 1.5 in to make a 2.5 in tall candle. Glue closed. Use the wing segment for the Two Step Bird bunch to make a flame. Add a small strip of paper to flame. Cover with glitter then use hot glue to glue in top of candle.
Frosting:
You will need about 5-6 feet of ruffled ribbon. Box #1 uses satin ribbon. I needed 15 feet to make 5 feet of ribbon. Box #2 used 6 feet of ruffled seam binding in crumb cake, 18 feet unruffled. You can do this by hand by running a basting stitch down the middle then ruffling it. OR use your sewing machine! I turned my tension all the way to 9 and maximized my stitch length. The machine ruffled the ribbon for me! All machines may vary so play with yours to find the settings that work for you.
Glue ½ Styrofoam ball to the lid of the box. Use a pen in top of ball to make a hole for your candle. Glue Candle in hole. Now glue the ruffled ribbon the ball. Let the ribbon lie as it likes. Do not force it to lie flat on the stitching. It will naturally want to twist around so let it. Fallow along the edge of the box if you wish to cove it or start at the edge of the foam if your box is painted or covered if you like (see box #1.) This is why I needed more length in ruffled ribbon for box #2.
Decorate! Use buttons, punches, silk roses, pearls or anything you wish to make sprinkles on your cupcake .Be careful not to make it look to yummy or someone may actually try to eat it. Have fun making your own confectionary masterpieces.
Posted by Joanna at 1:36 PM 3 comments
Monday, January 31, 2011
Here is a link to Karin's blog. She is the brain child behind the V-Day box that I posted yesterday. This is also how I came up with the idea for the cupcake box. I hope you enjoy here site. Don't forget to come back soon. It has been requested that I post a tutorial for the cupcake box so I shall.
Posted by Joanna at 1:39 PM 0 comments
Saturday, January 29, 2011
Spring Time Fun!
I've been busy working on a few projects these past few weeks. It took a while for me to get my new workspace set up and organized. I'll post pics as soon as I get it clean again.
Posted by Joanna at 10:09 AM 1 comments
Friday, August 20, 2010
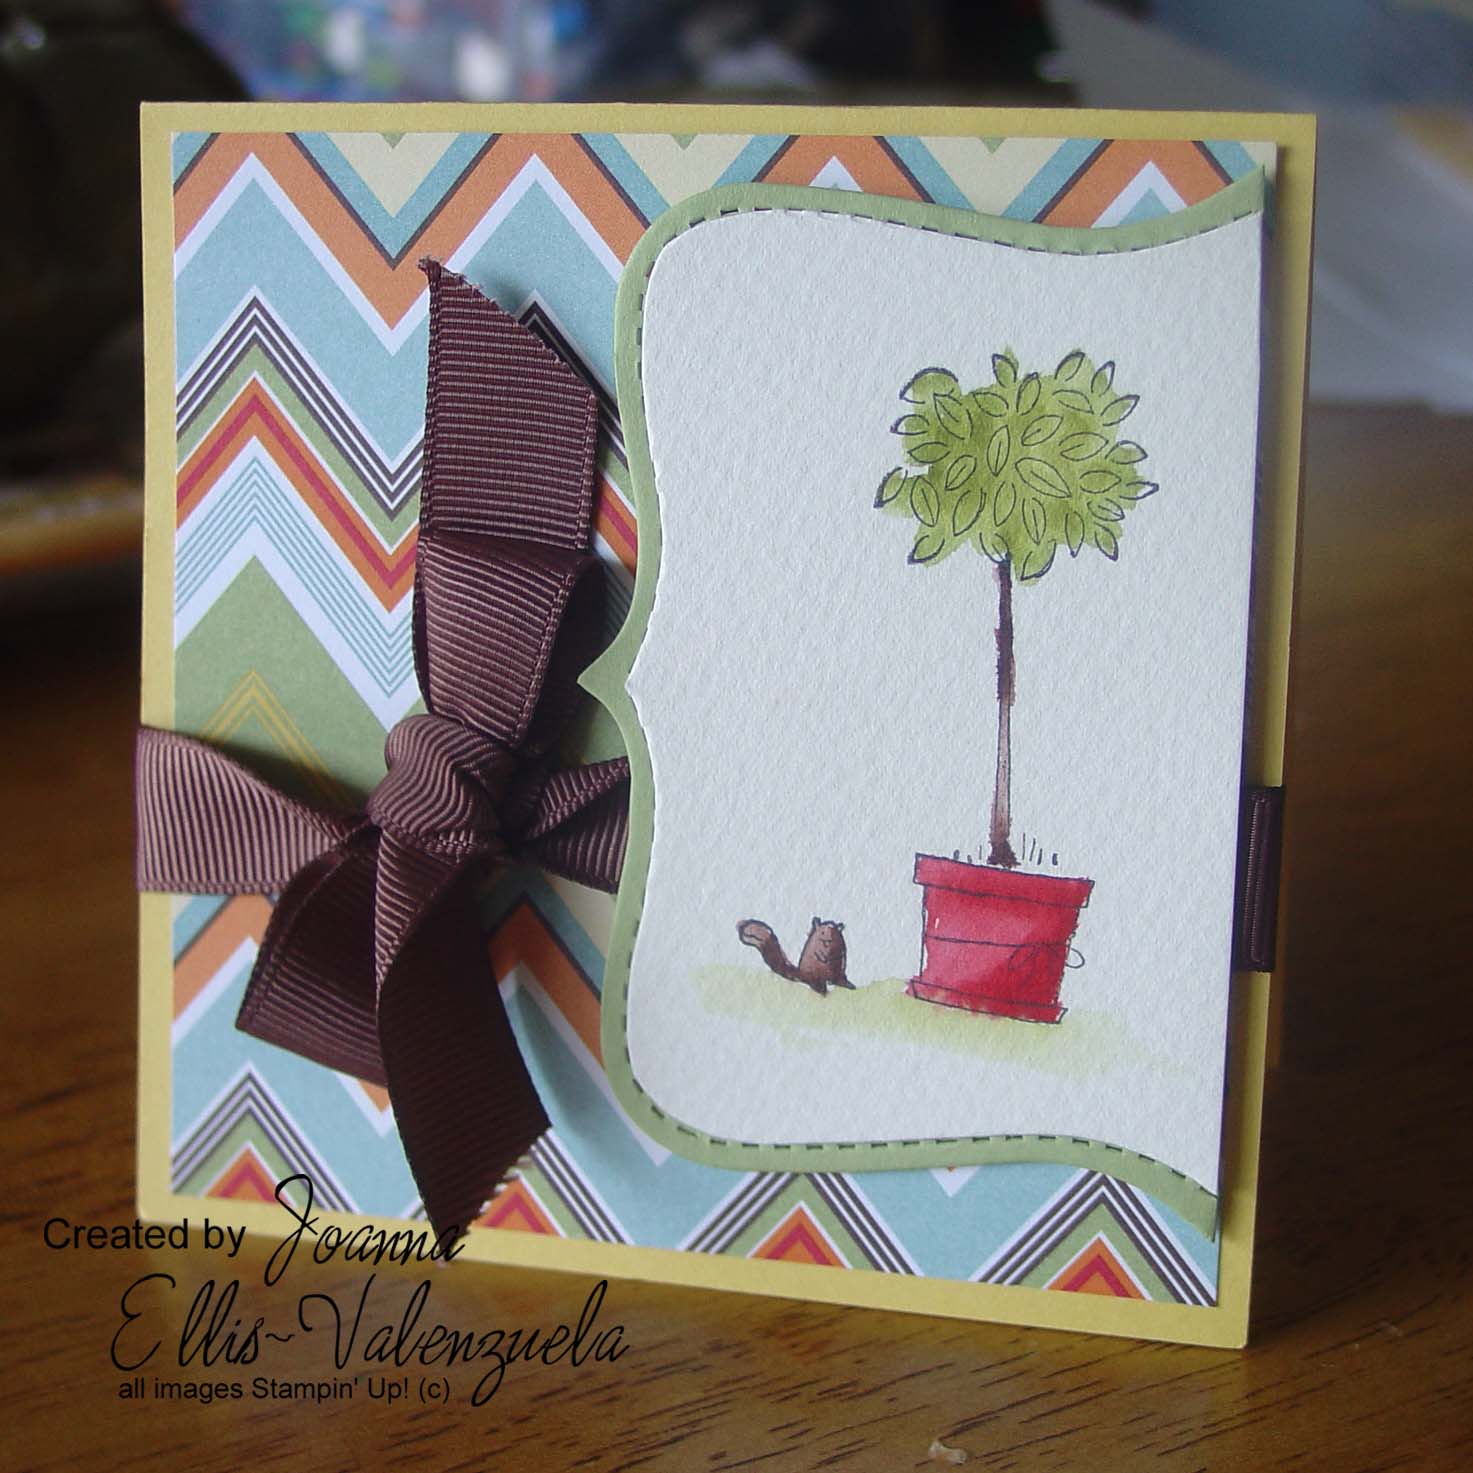
"Squeaks"

August is almost over and this means the summer mini is too. This card was made with a stamp set from the mini called "Bouquet Bunch."
I used Stazon ink on watercolor paper and a few Stamp-n-write markers to add color. I then used a water color pen to "smoosh" the color around. Instant art! The squirrel is so cute, I will name him Squeaks.
Thanks for stopping by.
Posted by Joanna at 4:22 AM 0 comments
Sunday, August 8, 2010

Howdy friends! What a weekend I had. I had a Workshop on Friday night. It was so much fun meeting new friends and stamping the night away. Saturday was the big Friendship Festival on Yokosuka Naval Base, Japan. I was there all afternoon, after sitting an hour and a half in traffic. My FRG had a booth selling Texas Nachos. Yummo! Sunday was spent catching up on some house work and starting the clean out process. Moving can be a bit stressful but now I have the chance to do a lot of purging.
Any How... here is another sample for you today. This one feature the new "Aviary" stamp set From Stampin' Up! and the "Curly Cute" set as well. It also uses the new "Sweet and Sour" paper. This card was so easy and cute to make. It is a 3x6 card instead of the usual 4.25x5.5. I like this card size not only because it is different but because SU sells envelopes for this type of card. The designer series paper is extra special. On one side of each double sided sheet it has a glossy finish. This paper is so gorgeous and I love that is uses only three colors, Pumpkin Pie, Rose Red, and Very Vanilla. makes it easy when deciding what ink colors to use.
Thanks for stoppin' by.
Stamp sets: Aviary, Curly Cute.
Paper: Whisper White, Daffodil Delight, Sweet and Sour Specialty DSP.
Ink: Rose Red, Daffodil Delight, Pumpkin Pie.
Accessories: Stampin' Dimentionals
Posted by Joanna at 5:59 AM 0 comments
Tuesday, August 3, 2010
Here is one of my latest cards using stamps and paper from the new catalog. I just love this stamp set "Calendar Kids." The four images are so cute and they hearken back to times long past with their vintage feel. they work so well with the other vintage sets in the catalog such as "Artistic Etchings" and "Notably Ornate." The patterned paper in this card is from the "Newsprint" Designer Series Paper pack and also has that vintage feel. The funny thing about this particular piece of paper is that on the opposite side there is a a bold reverse print with the name "John F. Ellis." I don't know what his middle name is but I have an uncle named John Ellis. As fun as it would have been to use that on this card, it was a bit to dark for it. the wonderful thing about our double sided paper is that there are two sides to chose from. This card also uses the new vintage brads, trinkets and crocheted ribbon. Beautiful!
Paper: Blushing Bride, Newsprint DSP, Very Vanilla, and Water color paper.
Ink: Craft Vanilla, Basic black (Stazon would have been better for the girl), Blushing bride, Rose red, Chocolate chip (hair) and Blush Blossom marker (still available) for her face.
Accessories: Black Satin Ribbon, Trinkets, Antique Brads, Victoria Crochet Trim. Water color pens.
Hostess Special!!!
Dates: July 27-August 31, 2010
Details
Hostesses will receive an additional $25 in hostess free merchandise dollars when they hold a workshop totaling $350 or more!
This is a great promotion right now. This means that with a $350 workshop you will get $40+$25= $65 free product from any of our current catalogs! Awesome!
Posted by Joanna at 3:53 PM 0 comments